5 Easy Wooden Toy Projects You Can Build This Weekend

Bedroom Decor Color Palette Guide – 24 Room Design Ideas & Styling Catalog
Struggling to visualize your dream bedroom? Stop guessing and steal our exact color formulas! Instantly unlock 24 professionally curated palettes, complete with paint aesthetics and styling secrets to transform your space today.
There's something deeply satisfying about crafting a toy from scratch—especially when it's made of wood. In a world dominated by plastic, wooden toys bring warmth, durability, and a touch of nostalgia to any home. Whether you're a seasoned woodworker or a complete beginner with only a few basic tools, you can create beautiful, safe, and timeless toys for your children or grandchildren. This article breaks down five wooden toy projects that require little more than a saw, sandpaper, drill, and wood glue. We'll cover design principles, safety considerations, and finishing touches that transform simple lumber into cherished playthings. Plus, we tie in aesthetic insights from Luxe Interiors + Design to ensure your toys also look stunning on a shelf.
Why Choose Wooden Toys?
Wooden toys aren't just beautiful—they're also better for the environment, more durable, and free from harmful chemicals. Unlike mass-produced plastic alternatives, handcrafted wood toys can become family heirlooms. They encourage open-ended play, spark creativity, and often have a natural weight and texture that children love. Building them yourself adds an extra layer of meaning, making each toy a token of love and skill.
Project 1: Classic Wooden Pull-Along Car
This project is ideal for beginners. You'll need a block of hardwood (like maple or birch), 1/4-inch dowel for the axles, wooden wheels (pre-cut or cut yourself), and a piece of string. Start by marking and cutting the car body to about 6 inches long, 3 inches wide, and 2 inches high. Use a handsaw (or jigsaw if available) and always wear safety goggles. Sand all surfaces until smooth—this is critical for a child-safe finish. Drill holes for the axles slightly larger than the dowel diameter so the wheels spin freely. Attach wheels with a dab of wood glue on the dowel ends. Finally, drill a small hole in the front for the pull-string, knotting it securely. Finish with a non-toxic oil or wax for a natural sheen.
Project 2: Wooden Building Blocks Set
Building blocks are a staple of childhood. Cut square and rectangular blocks from 2x2 lumber (or 1x1 for smaller hands). Aim for at least 12–15 blocks in various sizes to allow for interesting constructions. A simple miter saw or miter box with a backsaw will give clean cuts. Sand the edges and corners with 120-grit and then 220-grit paper to eliminate splinters. For extra visual appeal, you can paint some blocks with non-toxic milk paint in muted colors like sage, ochre, or navy, following the trend shown in many farmhouse-style decor guides. Leave others natural to highlight the wood grain.
Project 3: Beginner Wooden Puzzle
Trace a simple shape—like a star, a house, or a giraffe—onto a 3/4-inch pine board. Cut along the outline with a scroll saw (or coping saw if using only hand tools). Then, cut the shape into 3–5 puzzle pieces using a jigsaw or fret saw. Sand each piece individually, rounding over edges. To make the puzzle more engaging, use a contrasting wood species (e.g., walnut for a dark accent) or paint the whole shape before cutting. A small wooden frame keeps the pieces contained. This project teaches patience and precision.
50 Professional DIY Room Decor Ideas for Small Spaces
The Winzoo Sofa Does the Job of Three Different Pieces of Furniture
The Vongrasig Sectional Is Built for People Who Rearrange Their Room More Than Once a Year
The Shintenchi Sectional Solves the Small-Apartment Sofa Problem
This Reversible L-Shaped Gaming Desk Comes in Almost Any Style You Need
This 16-Color Moon Lamp Is a Genuinely Good Gift, Not Just a Gimmick
This Rolling Laundry Sorter Basically Does the Sorting Work For You
This 2-Tier Washer Dryer Countertop Turns Wasted Space Into a Real Folding Station
Kenmore's 4.5 Cu. Ft. Front Load Washer Might Be the Easiest Upgrade for Your Laundry Room
This Ginkgo Leaf Wall Mirror Is the Easiest Way to Upgrade a Boring Sofa Wall
24"x63" Pink Faux Framed Leaning Mirror Review: The Vanity Corner Piece Everyone's Pinning
11Lbs Portable Clothes Dryer (Blue) Review: A Fresh Take on Small-Space Laundry
11Lbs Portable Clothes Dryer (Black) Review: A Smart Fix for Small Laundry Rooms
63"x24" Ivory Arched Full-Body Mirror Review: A Soft, Neutral Statement Piece
63"x24" Wavy Black Arched Full-Body Mirror Review: Bold, Sculptural, Modern
Project 4: Balance Scale
A balance scale is part toy, part science. Build a base (6x4 inches), an upright post (8 inches tall), and a crossbeam (10 inches long) from scrap hardwood. Drill a shallow hole in the top of the post to hold a small rounded dowel for the fulcrum. Drill matching holes in the center of the crossbeam so it pivots freely. On each end of the crossbeam, attach small wooden cups or scoops (made from wood turning blanks or carved from a block). Use small washers as weights or craft colorful wooden discs. This toy teaches early math and physics concepts in a hands-on way.
Project 5: Wooden Rattle for Infants
Safety is paramount for infants. Choose a single piece of untreated hardwood (like beech) and turn it or carve it into a smooth, rounded dumbbell shape. If you don't have a lathe, buy a pre-turned wood handle or carve with a whittling knife. Inside, drill a small cavity and insert a few jingle bells (ensure they cannot fall out by covering the hole with a wooden plug and strong wood glue). Sand meticulously to 400-grit and apply a food-safe mineral oil or beeswax finish. No paint or varnish—just the natural wood. This simple rattle will become a treasured sensory toy.
Actionable Tips for Building Safe & Beautiful Wooden Toys
- Always sand in stages: Start with 100-grit, then 150-grit, and finish with 220-grit for a silky-smooth surface that's safe for little hands. For toys that will be mouthed, sand to at least 400-grit.
- Use non-toxic finishes: Choose food-safe mineral oil, beeswax, or milk-based paints. Avoid conventional varnishes and stains that may contain harmful chemicals.
- Design for durability: Reinforce joints with wood glue and allow 24-hour curing. For moving parts (wheels, axles), drill holes slightly oversized to prevent binding.
- Incorporate aesthetic principles: Look to nature-inspired color palettes—like soft greens, warm browns, and muted earth tones—to make toys that also serve as decor. For inspiration, browse the clean lines and organic materials featured on Luxe Interiors + Design.
- Test for choking hazards: Ensure all parts are securely attached and cannot be pulled off. Use the small-parts test cylinder (or simply eyeball that no piece fits entirely inside a toilet paper tube).
Frequently Asked Questions
1. What are the best woods for making beginner toys?
Hardwoods like maple, birch, beech, and walnut are ideal. They are dense, durable, and have a fine grain that sands smoothly. Pine and poplar are softer and easier to cut, making them great for first projects, but may dent more easily. Avoid woods like oak (can splinter) and any treated lumber, which is toxic.
2. Can I build these toys with only hand tools?
Yes, absolutely. With a handsaw, coping saw, sandpaper, a drill, and wood glue, you can complete every project listed above. A miter box helps with precise cuts, and a simple clamp holds pieces steady. While power tools speed up the process, hand tools give you more control and a deeper connection to the craft.
3. How do I make wooden toys safe for teething babies?
Follow strict material and finish guidelines. Use a single piece of untreated hardwood to avoid any glued joints that could come apart. Sand to at least 400-grit and apply only food-grade mineral oil or beeswax. Avoid any small parts (buttons, bells, paint) that could detach. The surface must be free of cracks or burrs. Always supervise teething babies during play.
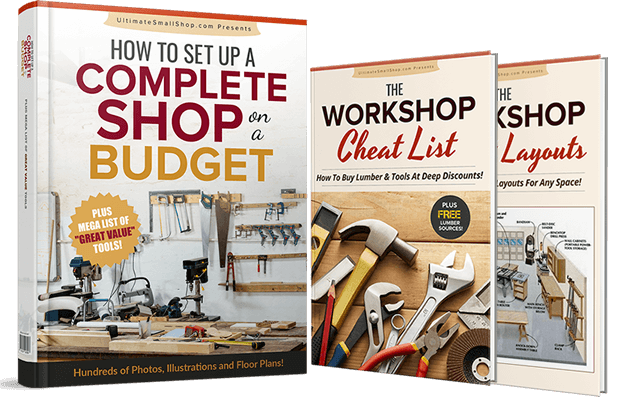
Master Woodworking from a Tiny Shop
Discover how to set up a complete woodworking shop on a budget. Get hundreds of photos, floor plans, and a mega list of discounted tools to build your dream workspace anywhere!