5 Secrets to This DIY Farmhouse Table in a Weekend

Bedroom Decor Color Palette Guide – 24 Room Design Ideas & Styling Catalog
Struggling to visualize your dream bedroom? Stop guessing and steal our exact color formulas! Instantly unlock 24 professionally curated palettes, complete with paint aesthetics and styling secrets to transform your space today.
Introduction: The Weekend Warrior's Farmhouse Table
Imagine walking into your dining room this Monday morning, not to an empty space or a flimsy store-bought piece, but to a solid, rustic farmhouse table you built yourself over the weekend. This isn't just furniture; it's a statement of craftsmanship, durability, and personal style. The DIY farmhouse table has become a cornerstone of modern interior design because it blends practicality with timeless charm. Built in a small shop, this project proves that you don't need a massive garage or expensive machinery to create heirloom-quality pieces. The key lies in smart planning, efficient use of space, and leveraging the right joinery techniques—like pocket holes and breadboard ends—that make the table both sturdy and beautiful. In this expert guide, we'll break down the exact steps and secrets to recreating this iconic piece, ensuring your weekend project yields a result that looks like it cost thousands.
Why a Farmhouse Table Works in Any Home
The farmhouse aesthetic is more than a trend; it's a design philosophy rooted in function and warmth. A DIY farmhouse table's appeal lies in its versatility. Whether your home leans modern, industrial, or traditional, the clean lines and natural wood grain of a farmhouse table anchor the room. The typical design features a thick plank top, often from reclaimed pine or fir, paired with turned or tapered legs. This combination creates a visual balance of mass and elegance. In a small shop, the challenge is to manage these large components without sacrificing precision. However, with careful measurement and sequential assembly, even a compact space can yield professional results. The table's scale invites gatherings, making it the heart of the home—perfect for family dinners, holiday feasts, or even a remote workspace.
Essential Tools and Materials for a Small Shop
Before you dive in, gather these cost-effective tools that maximize your small shop's potential:
- Circular saw with a straight edge guide – For ripping long boards to width.
- Pocket hole jig (e.g., Kreg R3) – For quick, strong joints in the base and aprons.
- Random orbital sander – To achieve a silky smooth finish efficiently.
- Clamps (at least four 48-inch bar clamps) – Essential for panel glue-ups.
- Wood glue and finish nails – For breadboard ends and last-minute adjustments.
Materials center on select grade pine or douglas fir for the top, which offers a beautiful grain and workability. For the legs, consider 4x4 posts turned on a small lathe or crafted from glued-up 2x4s for a chunky, farmhouse silhouette. While building, remember that finishing is half the battle: a wipe-on polyurethane or a mix of vinegar and steel wool (for an aged gray look) protects and personalize the piece.
Step-by-Step Build in Under 48 Hours
Start Friday evening by cutting all lumber to rough length and allowing it to acclimate in your shop. Saturday morning, begin with the tabletop: rip boards to width, arrange them for best grain match, and glue them up using clamps. While the top cures, build the base—cut legs and aprons, drill pocket holes, and assemble the frame. Sunday, attach breadboard ends with a floating tenon to allow wood movement (a crucial detail for longevity), then sand everything through 220 grit. Apply three coats of finish, sanding lightly between coats. By Sunday evening, you have a table ready to use Monday morning.
50 Professional DIY Room Decor Ideas for Small Spaces
The Upvilla Loveseat Is Built for People Who Actually Want to Lounge, Not Just Sit
The Vongrasig Sectional Is Built for People Who Rearrange Their Room More Than Once a Year
The Shintenchi Sectional Solves the Small-Apartment Sofa Problem
This Reversible L-Shaped Gaming Desk Comes in Almost Any Style You Need
This 16-Color Moon Lamp Is a Genuinely Good Gift, Not Just a Gimmick
This Rolling Laundry Sorter Basically Does the Sorting Work For You
This 2-Tier Washer Dryer Countertop Turns Wasted Space Into a Real Folding Station
Kenmore's 4.5 Cu. Ft. Front Load Washer Might Be the Easiest Upgrade for Your Laundry Room
This Ginkgo Leaf Wall Mirror Is the Easiest Way to Upgrade a Boring Sofa Wall
24"x63" Pink Faux Framed Leaning Mirror Review: The Vanity Corner Piece Everyone's Pinning
11Lbs Portable Clothes Dryer (Blue) Review: A Fresh Take on Small-Space Laundry
11Lbs Portable Clothes Dryer (Black) Review: A Smart Fix for Small Laundry Rooms
63"x24" Ivory Arched Full-Body Mirror Review: A Soft, Neutral Statement Piece
63"x24" Wavy Black Arched Full-Body Mirror Review: Bold, Sculptural, Modern
Actionable Tips for the Perfect Farmhouse Table
To elevate your build from amateur to expert, follow these design and technique tips:
- Plan for wood movement – Use breadboard ends not just for looks but to prevent the top from cracking. Allow the center tenon to be fixed while outer tenons slide within elongated mortises.
- Choose the right finish – For a warm, matte sheen that highlights grain, use a satin water-based polyurethane. Avoid gloss, which can look plastic and highlight imperfections.
- Embrace imperfections – In farmhouse style, knots, nail holes, and slight color variations add character. Fill larger voids with epoxy but leave small marks for authenticity.
- Strengthen the base – Add corner braces or ties to prevent racking. A simple cross-brace on the underside of the apron adds rigidity without being visible.
- Protect your floors – Install felt pads or rubber glides under the legs to prevent scratching, especially on hardwood or tile.
Expert Validation and Inspiration
For further inspiration and expert design validation, turn to Country Living, a trusted source that consistently features farmhouse and rustic decor. Their approach to blending old-world charm with modern livability aligns perfectly with this project. Building your own table not only saves money but gives you a sense of pride unmatched by any store-bought item. For more budget-friendly woodworking projects that maximize a small shop, be sure to check out our related decor guide on setting up a complete workshop for under $500.
Frequently Asked Questions
Can I build this table without a planer or jointer?
Yes, absolutely. Many small shop builders successfully create farmhouse tables using dimensional lumber from home centers and a circular saw. The key is to select straight, dry boards and use a straight edge guide for ripping. A random orbital sander with 80-grit to 220-grit progression will smooth out minor variations. For an even more rustic look, you can even leave some saw marks or use a hand plane for a distressed finish.
How do I attach the tabletop to the base to allow for wood movement?
The best method uses figure-eight fasteners (also called tabletop clips) or Z-clips. These devices are screwed into both the apron and the tabletop while allowing the top to expand and contract seasonally across its width. Avoid rigid metal brackets or glue. A 1/4-inch gap between the apron and top is normal and should be covered by the overhang. For a clean look, pre-drill for the clips during assembly.
What's the ideal size for a farmhouse table in a standard dining room?
A common and versatile size is 36 inches wide by 72 inches long, which seats six to eight people comfortably. The height should be standard dining height at 30 inches. For larger families or frequent entertaining, extend the length to 84 or 96 inches. In a small shop, break the top into two panels and join them with a hidden glue line or use a lap joint. Remember, the table's base should be at least 6 inches narrower than the top for seating clearance.
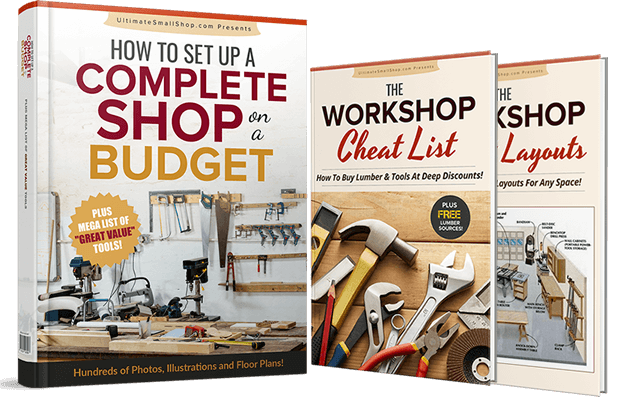
Master Woodworking from a Tiny Shop
Discover how to set up a complete woodworking shop on a budget. Get hundreds of photos, floor plans, and a mega list of discounted tools to build your dream workspace anywhere!