Genius Hacks for a Pegboard Wall of Tools

Bedroom Decor Color Palette Guide – 24 Room Design Ideas & Styling Catalog
Struggling to visualize your dream bedroom? Stop guessing and steal our exact color formulas! Instantly unlock 24 professionally curated palettes, complete with paint aesthetics and styling secrets to transform your space today.
Why a Pegboard Wall Is the Ultimate Hand Tool Storage Solution
Every home DIY enthusiast knows the struggle: a toolbox overflowing with screwdrivers, a drawer crammed with wrenches, and a bench cluttered with hammers. The solution is elegant and timeless: a pegboard wall that holds every hand tool you own. This isn't just about hanging things on a board—it's about creating a visual, tactile system that puts every tool within arm's reach. When done right, a pegboard wall transforms a chaotic garage or workshop into a productivity powerhouse.
The beauty of a pegboard wall lies in its adaptability. You can start small with a single panel and expand as your tool collection grows. The perforated surface, combined with the right hooks, shelves, and bins, becomes a living storage grid. The key is to design your layout with intention, grouping tools by frequency of use, size, or project type. A well-planned pegboard wall doesn't just store tools—it tells a story of efficiency and craftsmanship.
Design Principles for Your Pegboard Wall
Choosing the Right Pegboard Material
Standard hardboard pegboard is inexpensive and widely available, but for heavy tools like hammers or power drills, you need a thicker board or one with metal inserts. Consider powder-coated steel pegboard panels for durability and strength. These can support up to 50 pounds per hook when properly anchored. If you prefer a rustic look, you can mount wood pegboard tiles over a plywood backer, but ensure the board is at least ¼-inch thick for standard hooks.
Optimal Placement and Height
Mount your pegboard at eye level for the most frequently used tools. A common height is 24 to 30 inches off the floor, leaving room for a workbench below. The board should extend at least 48 inches wide to accommodate a full hand tool collection. Leave 12 inches of clearance above the board for taller tools like levels or sledgehammers. Always use wall studs or heavy-duty anchors—a fully loaded pegboard can weigh over 100 pounds.
Hook and Accessory Selection
The right hardware makes all the difference. Use single hooks for light items like screwdrivers, double hooks for tools with holes (scissors, pliers), and U-hooks for round-handled tools (shovels, brooms). Add small shelves for power tool batteries, tape measures, or safety glasses. Bins or baskets can hold smaller parts like bits, nails, or sanding sponges. For a professional finish, label each hook or outline the tool shapes on the board with a permanent marker or vinyl decals.
Actionable Design Tips for Your Pegboard Wall
- Group by function: Place hammers and mallets together on one section, wrenches and sockets on another, and measuring tools near your workbench. This logical zoning speeds up workflow.
- Create a shadow board effect: Paint your pegboard in a bold color (e.g., deep blue or bright orange) and then use a lighter paint to fill in the outline of each tool. This makes it instantly obvious where each tool belongs and when one is missing.
- Incorporate magnetic strips: Install a thin magnetic strip along the top of the pegboard to hold metal bits, screwdrivers, or small wrenches. This frees up pegboard holes for larger tools.
- Install task-specific lighting: A LED strip or a swing-arm lamp above the pegboard eliminates shadows and makes it easier to see small tools. This simple upgrade reduces frustration and speeds up project time.
- Add a power strip: Mount a power strip below the pegboard so you always have an outlet for charging drills or plugging in tools. This keeps cords off the floor and within reach.
For a deeper dive into transforming your entire garage, check out our link to our related decor guide on weekend garage makeovers on a budget. That resource covers flooring, shelving, and lighting to complement your pegboard wall.
Customizing Your Pegboard for Every Tool
No two tool collections are identical, but there are universal layouts that work. Start with the items you reach for most: your favorite hammer, flathead screwdriver, and utility knife. Place these in the center of your board at chest height. Less frequently used tools go at the edges or higher up. Rarely used items like pipe wrenches or specialty saws can go on a secondary pegboard in a less accessible area.
The Winzoo Sofa Does the Job of Three Different Pieces of Furniture
The Upvilla Loveseat Is Built for People Who Actually Want to Lounge, Not Just Sit
The Vongrasig Sectional Is Built for People Who Rearrange Their Room More Than Once a Year
The Shintenchi Sectional Solves the Small-Apartment Sofa Problem
This Reversible L-Shaped Gaming Desk Comes in Almost Any Style You Need
This 16-Color Moon Lamp Is a Genuinely Good Gift, Not Just a Gimmick
This Rolling Laundry Sorter Basically Does the Sorting Work For You
This 2-Tier Washer Dryer Countertop Turns Wasted Space Into a Real Folding Station
Kenmore's 4.5 Cu. Ft. Front Load Washer Might Be the Easiest Upgrade for Your Laundry Room
This Ginkgo Leaf Wall Mirror Is the Easiest Way to Upgrade a Boring Sofa Wall
24"x63" Pink Faux Framed Leaning Mirror Review: The Vanity Corner Piece Everyone's Pinning
11Lbs Portable Clothes Dryer (Blue) Review: A Fresh Take on Small-Space Laundry
11Lbs Portable Clothes Dryer (Black) Review: A Smart Fix for Small Laundry Rooms
63"x24" Ivory Arched Full-Body Mirror Review: A Soft, Neutral Statement Piece
63"x24" Wavy Black Arched Full-Body Mirror Review: Bold, Sculptural, Modern
For a truly bespoke setup, consider custom 3D-printed brackets or hooks that fit your specific tools. For example, you can design a cradle that holds your angle grinder by its handle or a notch that secures your drill sideways. This level of customization is the difference between a functional wall and a masterpiece of efficiency.
Another advanced technique is to combine your pegboard with other storage solutions. For example, mount a slatwall panel alongside the pegboard for bulky items like rakes or extension cords. Use small metal bins on hooks for loose parts like drill bits or sandpaper discs. The pegboard becomes the central hub, but it doesn't have to do all the work.
Experts at Lonny emphasize that the best workshops are those that evolve with your needs. They recommend taking a photo of your tool layout every six months and moving tools that sit untouched to a less prominent spot. This keeps your board fresh and your workflow efficient.
Frequently Asked Questions
How much weight can a pegboard hold?
Standard ¼-inch hardboard pegboard holds up to 20 pounds per hook when mounted to studs. Heavy-duty metal pegboard can handle 50–75 pounds per hook. Always check the manufacturer's weight limits and use long screws into wall studs for maximum stability.
Can I mount a pegboard on drywall without studs?
Yes, but you must use heavy-duty drywall anchors rated for at least 50 pounds. Use toggle bolts or expanding anchors. For full tool collections, we strongly recommend finding at least two studs to screw into. If you can't find studs, consider a backer board of ¾-inch plywood attached to the wall, then mount the pegboard onto that.
What's the best way to organize small hand tools like wrenches and screwdrivers?
Use double hooks for wrenches (hang them by the ring) and single hooks for screwdrivers (hang by the handle if there's a hole, or use a groove holder). For tools with no hanging hole, you can add wire loops or use pegboard baskets. A magnetic tool bar above the pegboard also works brilliantly for metal tools.
Final Thoughts
A pegboard wall that holds every hand tool you own is more than a storage solution—it's a system that respects your time and your craft. By choosing the right materials, planning your layout, and using smart accessories, you can create a workspace that inspires you every time you walk in. Start with a single board, experiment with hooks, and watch your tool chaos transform into order.
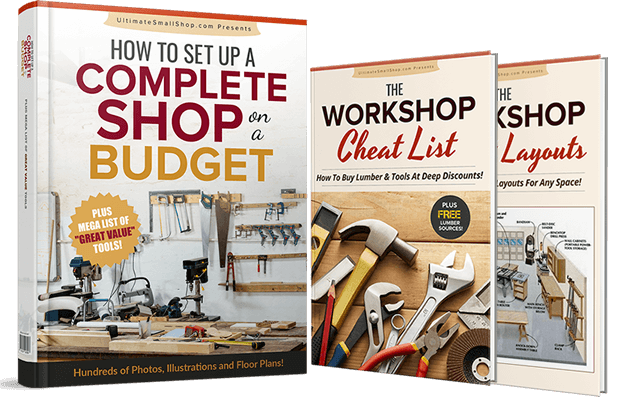
Master Woodworking from a Tiny Shop
Discover how to set up a complete woodworking shop on a budget. Get hundreds of photos, floor plans, and a mega list of discounted tools to build your dream workspace anywhere!