5 Secrets to Building a Workshop with Hand-Me-Downs

Bedroom Decor Color Palette Guide – 24 Room Design Ideas & Styling Catalog
Struggling to visualize your dream bedroom? Stop guessing and steal our exact color formulas! Instantly unlock 24 professionally curated palettes, complete with paint aesthetics and styling secrets to transform your space today.
Introduction: The Beauty of a Hand-Me-Down Workshop
Building your first workshop is a rite of passage for any DIY enthusiast. When you’re starting out, new tools can be prohibitively expensive, but hand-me-down tools offer a sustainable, budget-friendly alternative. I built my entire first workshop using tools passed down from family and friends—everything from a rusty circular saw to a decades-old workbench. The result is a space that feels both rustic and resourceful, with every scratch telling a story. In this article, I’ll break down the exact steps I took and the design principles I followed to create a functional workshop that costs next to nothing. Whether you’re a weekend warrior or a serious woodworker, these strategies will help you transform inherited clutter into an organized, efficient workspace.
Step 1: Assess and Organize Your Hand-Me-Down Tools
Before you start building, you need to take inventory. Hand-me-down tools often arrive in various states of disrepair. I sorted everything by type: cutting tools, measuring tools, fastening tools, and accessories. I cleaned each piece with a wire brush and light oil, then tested functionality. This process revealed hidden gems—like an old Stanley plane that just needed sharpening. To maximize space, I mounted a pegboard on the wall using salvaged lumber. For heavy items like a drill press, I built a sturdy rolling base from scrap plywood. The key is to embrace imperfection—a chipped hammer works just as well as a new one.
Essential Layout Tips
- Zone your workbench: Dedicate one area for assembly, one for cutting, and one for finishing. This prevents cross-contamination of sawdust and paint.
- Use vertical storage: Install shelves above the bench for small parts and hand tools. Old mason jars screwed to a shelf make great organizers for screws and nails.
- Create a sharpening station: Even dull chisels can be revived with a simple whetstone and a holder. Keep sharpening tools accessible near the bench.
- Label everything: Use a paint marker on tool handles to prevent mix-ups. This also adds a personal touch to inherited items.
For a comprehensive guide on building your first bookshelf with beginner techniques, check out our related decor guide that complements your workshop skills.
Step 2: Design for Efficiency on a Budget
With limited funds, every dollar counts. I repurposed a solid-core door from a renovation site as my primary workbench top—it’s flat, durable, and free. For the base, I used 2x4s from a scrap pile and casters from an old shopping cart. The total cost for the bench was under $10. Lighting is another critical element; I installed clamp-on LED work lights from a thrift store. To organize cables and power tools, I built a simple charging station from a wooden crate. The entire workshop fits in a 10x12 foot corner of my garage, proving that small spaces can produce big results.
Actionable Design Tips
- Prioritize workflow: Arrange tools in the order you use them—measure first, then cut, then assemble. This minimizes walking back and forth.
- Add a magnetic strip: Old filing cabinets or refrigerator parts can be mounted on the wall to hold metal tools like wrenches and screwdrivers.
- Use a shadow board: Outline each tool’s shape on the pegboard with a paint pen. This makes it easy to spot missing items and ensures everything has a home.
- Incorporate natural lighting: If possible, position your workshop near a window. Natural light reduces eye strain and improves accuracy.
For expert validation on organizing small spaces, visit Real Simple for additional household tips.
50 Professional DIY Room Decor Ideas for Small Spaces
The Winzoo Sofa Does the Job of Three Different Pieces of Furniture
The Vongrasig Sectional Is Built for People Who Rearrange Their Room More Than Once a Year
The Shintenchi Sectional Solves the Small-Apartment Sofa Problem
This Reversible L-Shaped Gaming Desk Comes in Almost Any Style You Need
This 16-Color Moon Lamp Is a Genuinely Good Gift, Not Just a Gimmick
This Rolling Laundry Sorter Basically Does the Sorting Work For You
This 2-Tier Washer Dryer Countertop Turns Wasted Space Into a Real Folding Station
Kenmore's 4.5 Cu. Ft. Front Load Washer Might Be the Easiest Upgrade for Your Laundry Room
This Ginkgo Leaf Wall Mirror Is the Easiest Way to Upgrade a Boring Sofa Wall
24"x63" Pink Faux Framed Leaning Mirror Review: The Vanity Corner Piece Everyone's Pinning
11Lbs Portable Clothes Dryer (Blue) Review: A Fresh Take on Small-Space Laundry
11Lbs Portable Clothes Dryer (Black) Review: A Smart Fix for Small Laundry Rooms
63"x24" Ivory Arched Full-Body Mirror Review: A Soft, Neutral Statement Piece
63"x24" Wavy Black Arched Full-Body Mirror Review: Bold, Sculptural, Modern
Step 3: Maintain and Expand Your Tool Collection
Hand-me-down tools require ongoing care. I set up a simple maintenance schedule: sharpen blades every month, oil hinges quarterly, and replace worn handles immediately. Networking with family and neighbors often leads to more free tools—just ask! I received a vintage router and a set of chisels by simply mentioning my workshop project at a family dinner. Over time, your collection will grow, but resist the urge to buy new unless necessary. A well-maintained antique tool often outperforms a cheap modern alternative.
Frequently Asked Questions
Q1: Can I build a workshop without any power tools?
Absolutely. Many hand-me-down tools are hand-powered—saws, planes, and braces. You can build an entire workshop with hand tools and a simple workbench. Start with a good saw, hammer, and measuring tape, then add power tools as you find deals or inherit them.
Q2: How do I clean rusty hand-me-down tools?
Soak rusty tools in white vinegar for 24 hours, then scrub with a wire brush. Rinse with water, dry immediately, and apply a light coat of mineral oil. For heavier rust, use a rust dissolver like naval jelly.
Q3: What’s the single most important thing for a beginner workshop?
A sturdy workbench. It doesn’t need to be fancy—a solid door on a frame works perfectly. The bench should be weighted or bolted to the floor to minimize vibration when sawing or hammering.
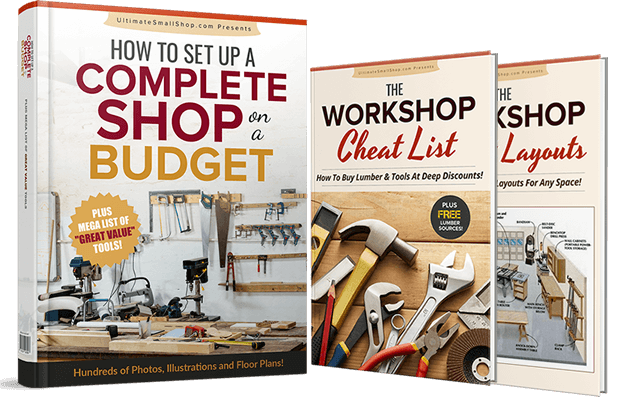
Master Woodworking from a Tiny Shop
Discover how to set up a complete woodworking shop on a budget. Get hundreds of photos, floor plans, and a mega list of discounted tools to build your dream workspace anywhere!